

CapCut
Editing Lab.
Learn exactly where to tap, how to import, trim, split, caption, style, balance audio and export a clean vertical video inside CapCut.
From camera roll
to timeline.
Begin with the correct clips and a 9:16 vertical project so the video is ready for Reels, TikTok and Facebook.
Open CapCut
Open the app and find the main home screen.
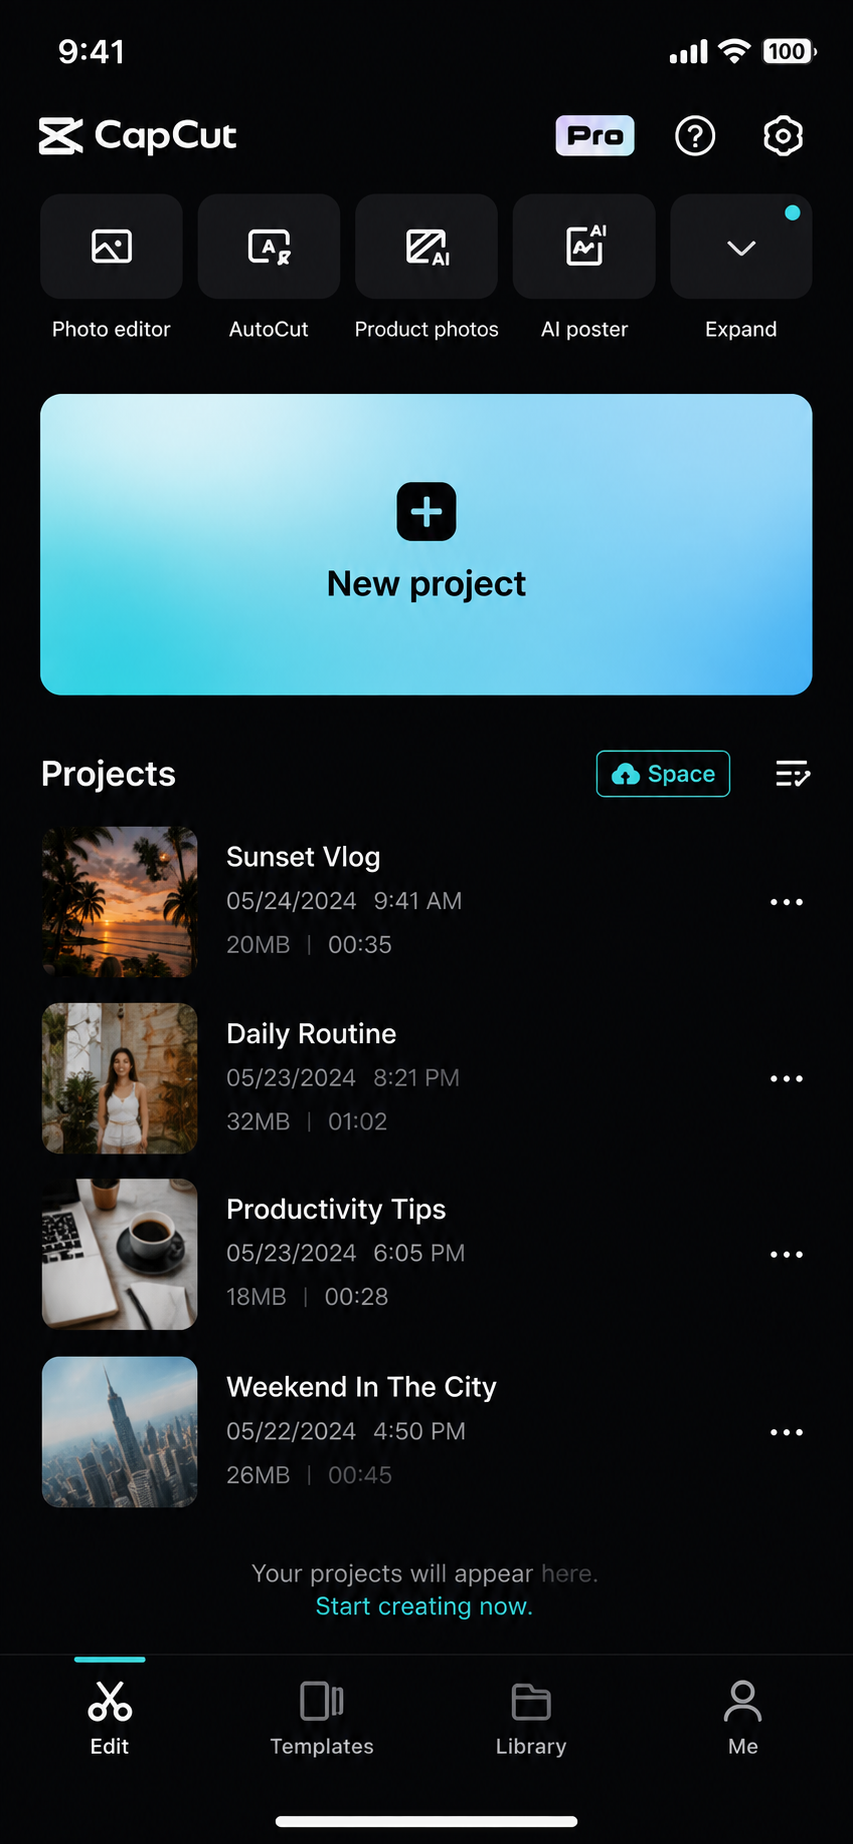
Tap New Project
Select the New Project button to begin a fresh edit.
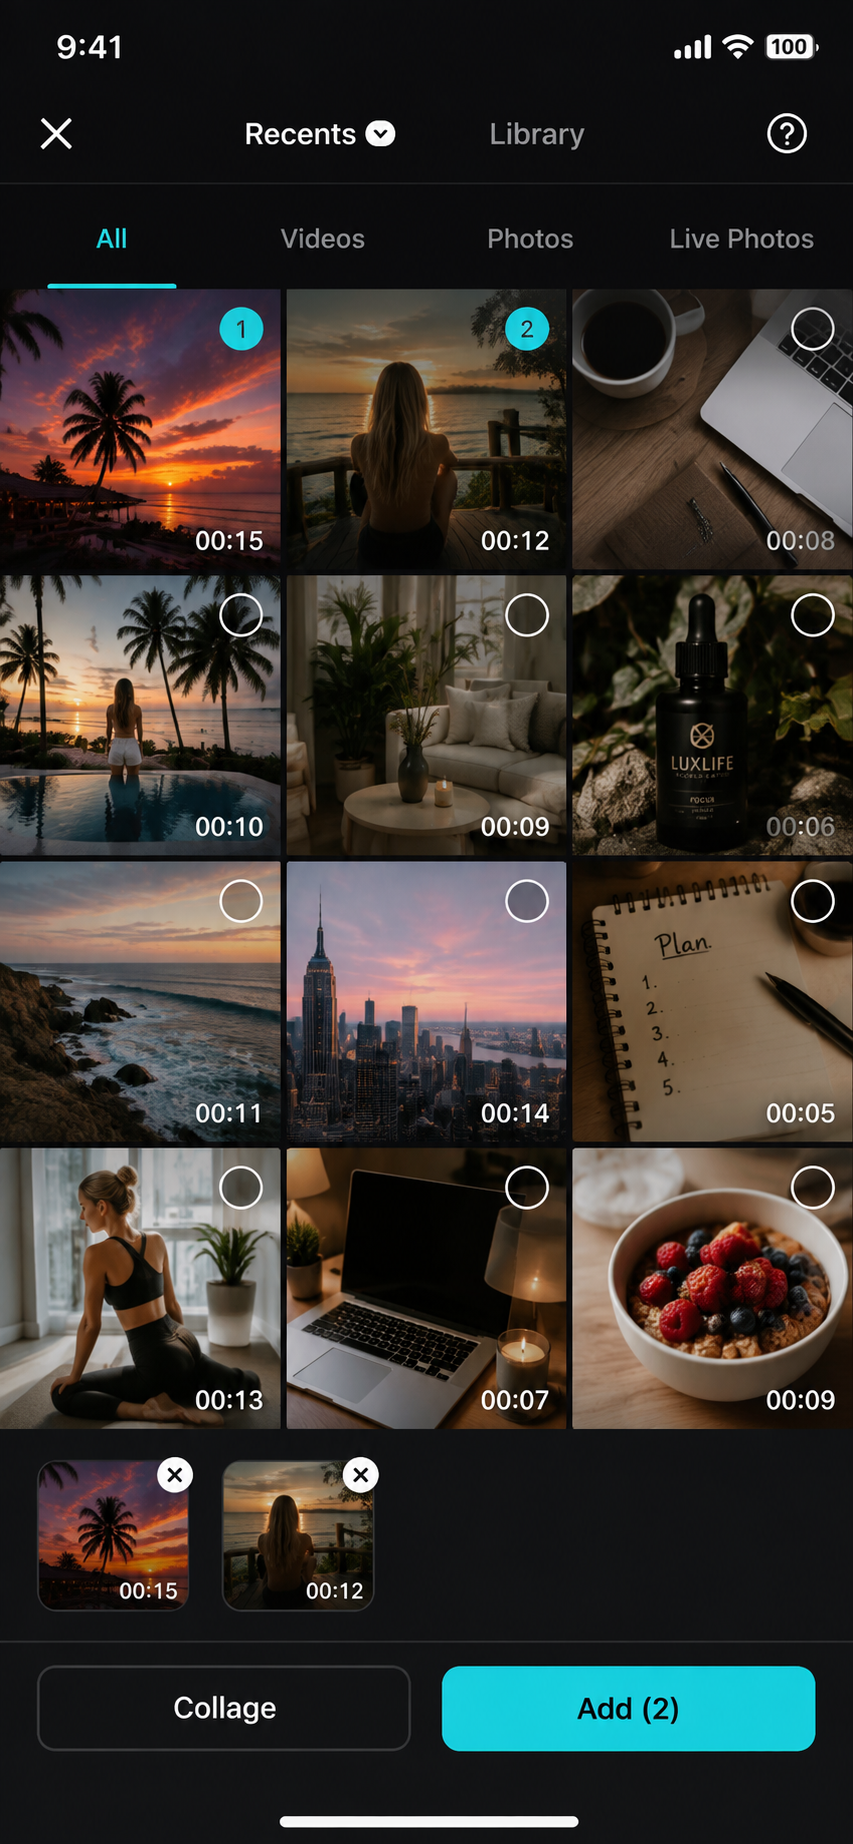
Select Your Clips
Choose your vertical videos in the order you want them to appear.
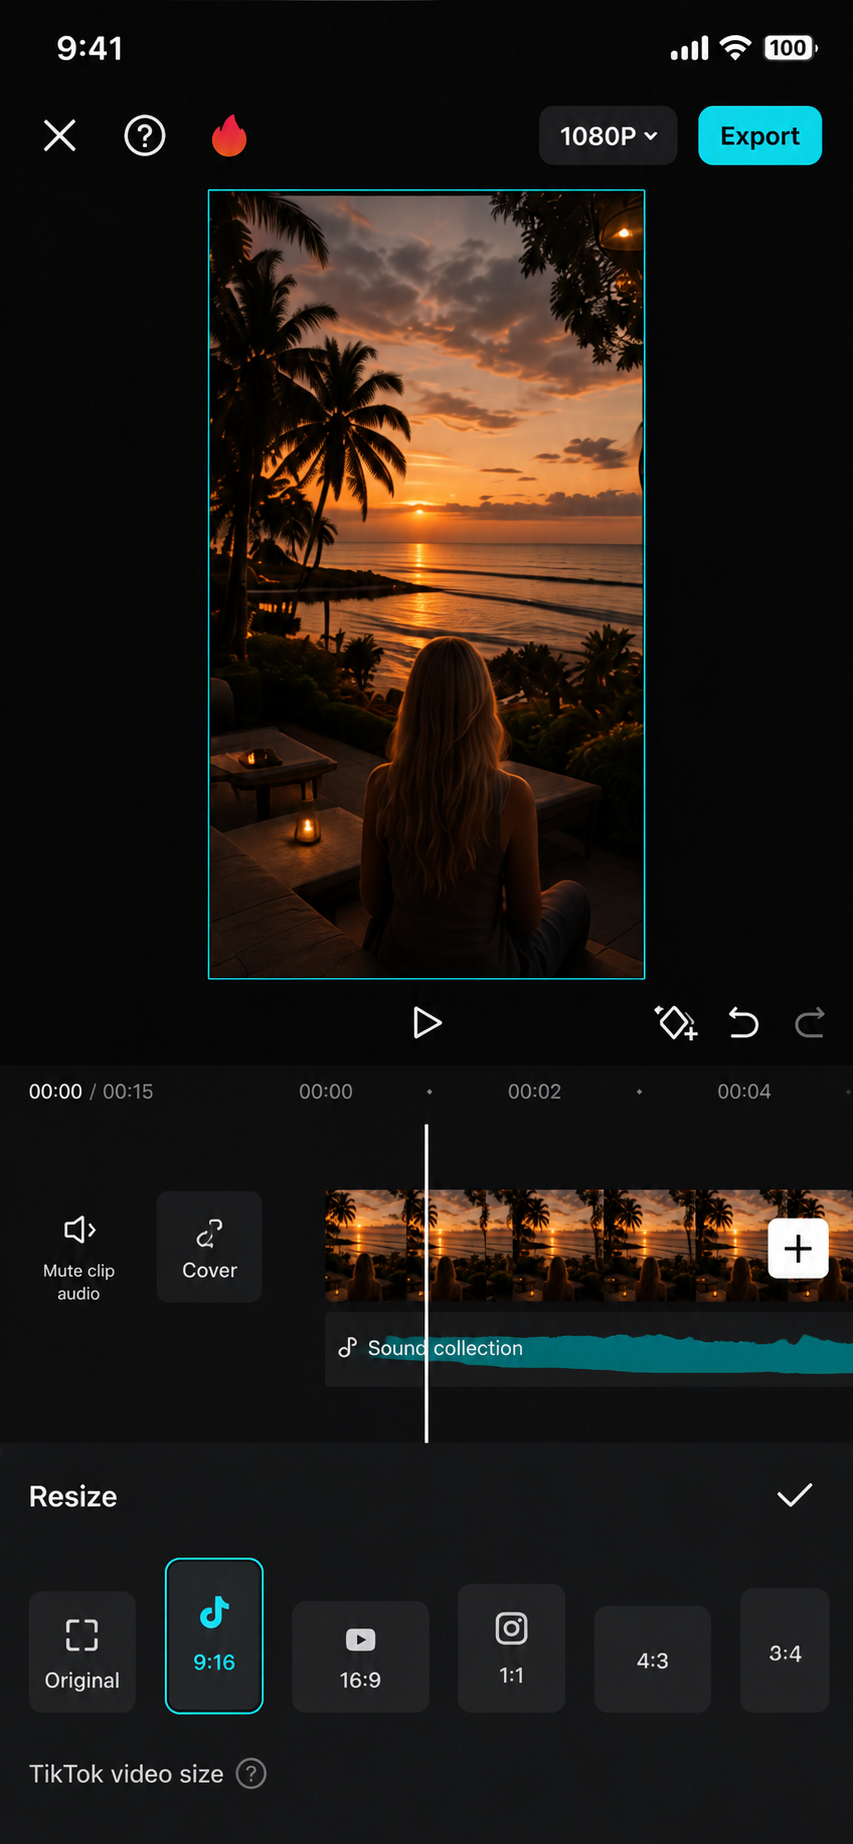
Confirm 9:16
Use a vertical 9:16 canvas for Instagram Reels, Facebook Reels and TikTok.
Clean the clips.
Keep it moving.
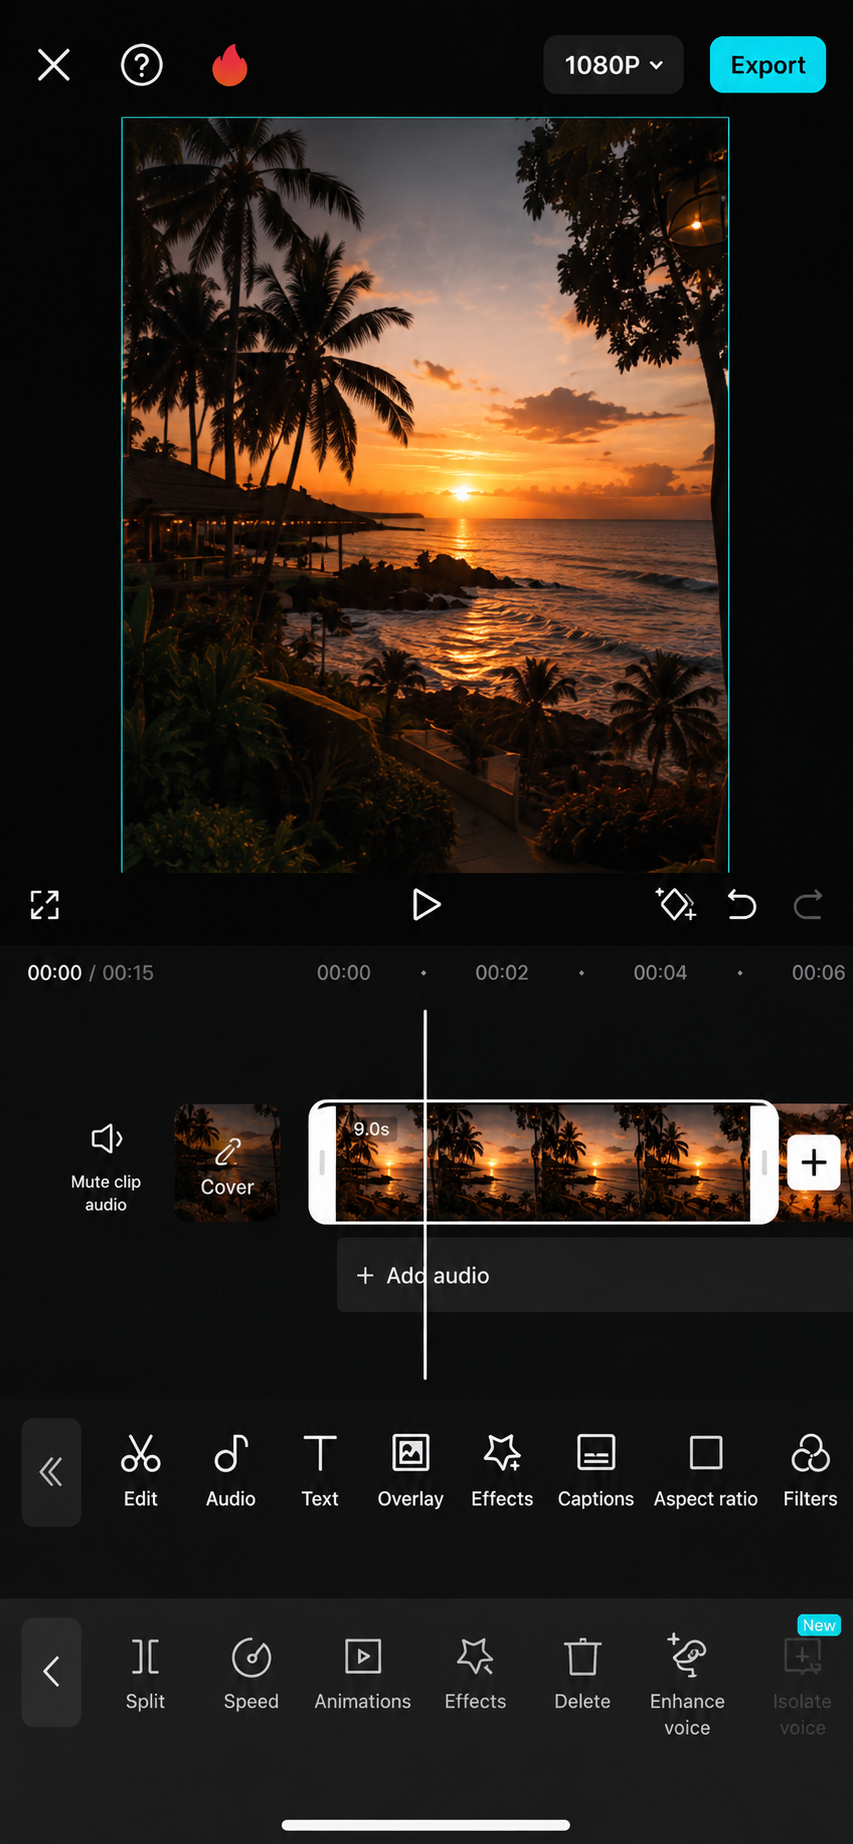
The timeline is where you trim dead space, split mistakes and arrange every clip.
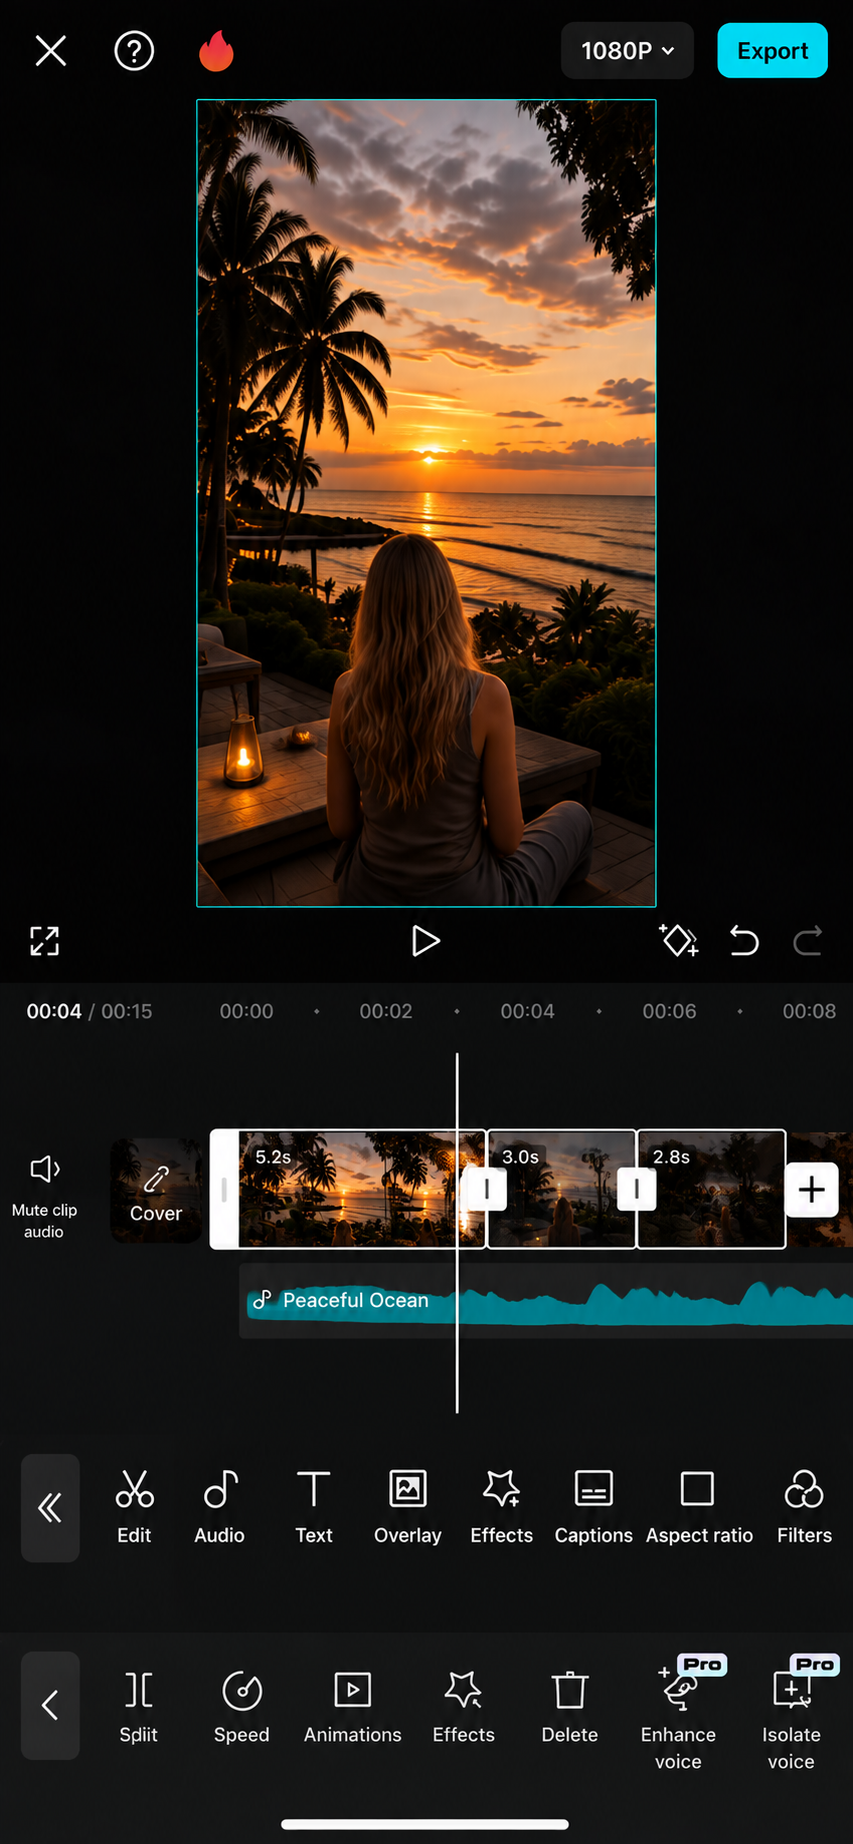
Understand the Timeline
Identify the video track, playhead and editing toolbar.
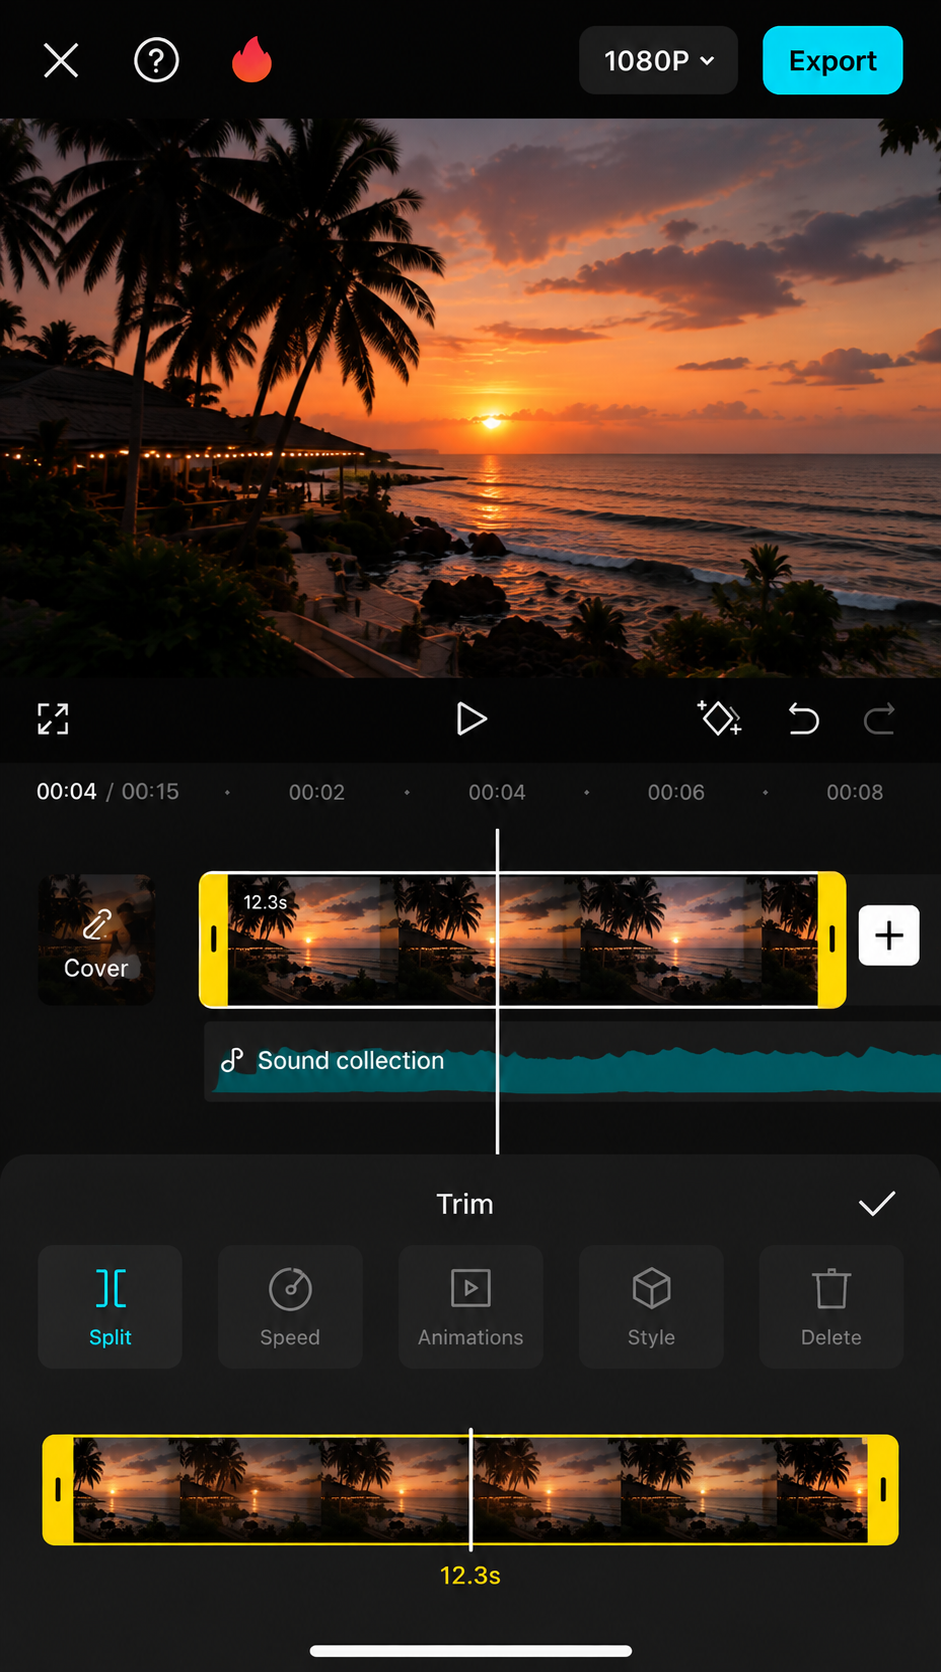
Trim the Clip
Tap the clip and drag the handles inward to remove dead space.
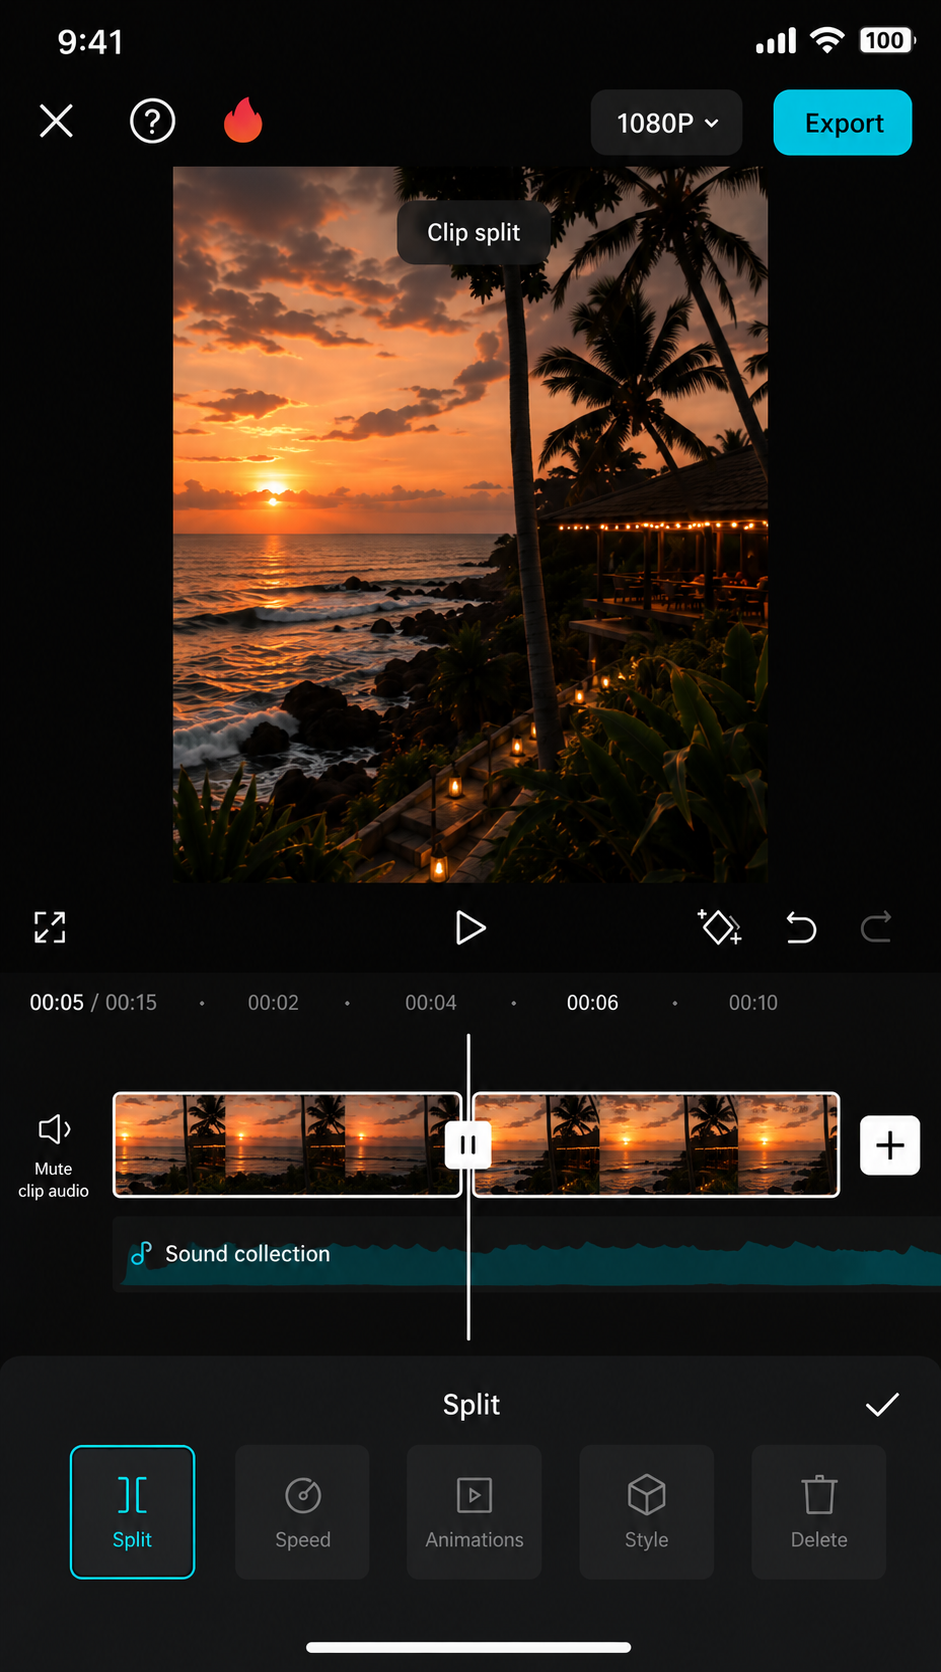
Split a Mistake
Move the playhead to the mistake, tap Split, then delete the unwanted section.
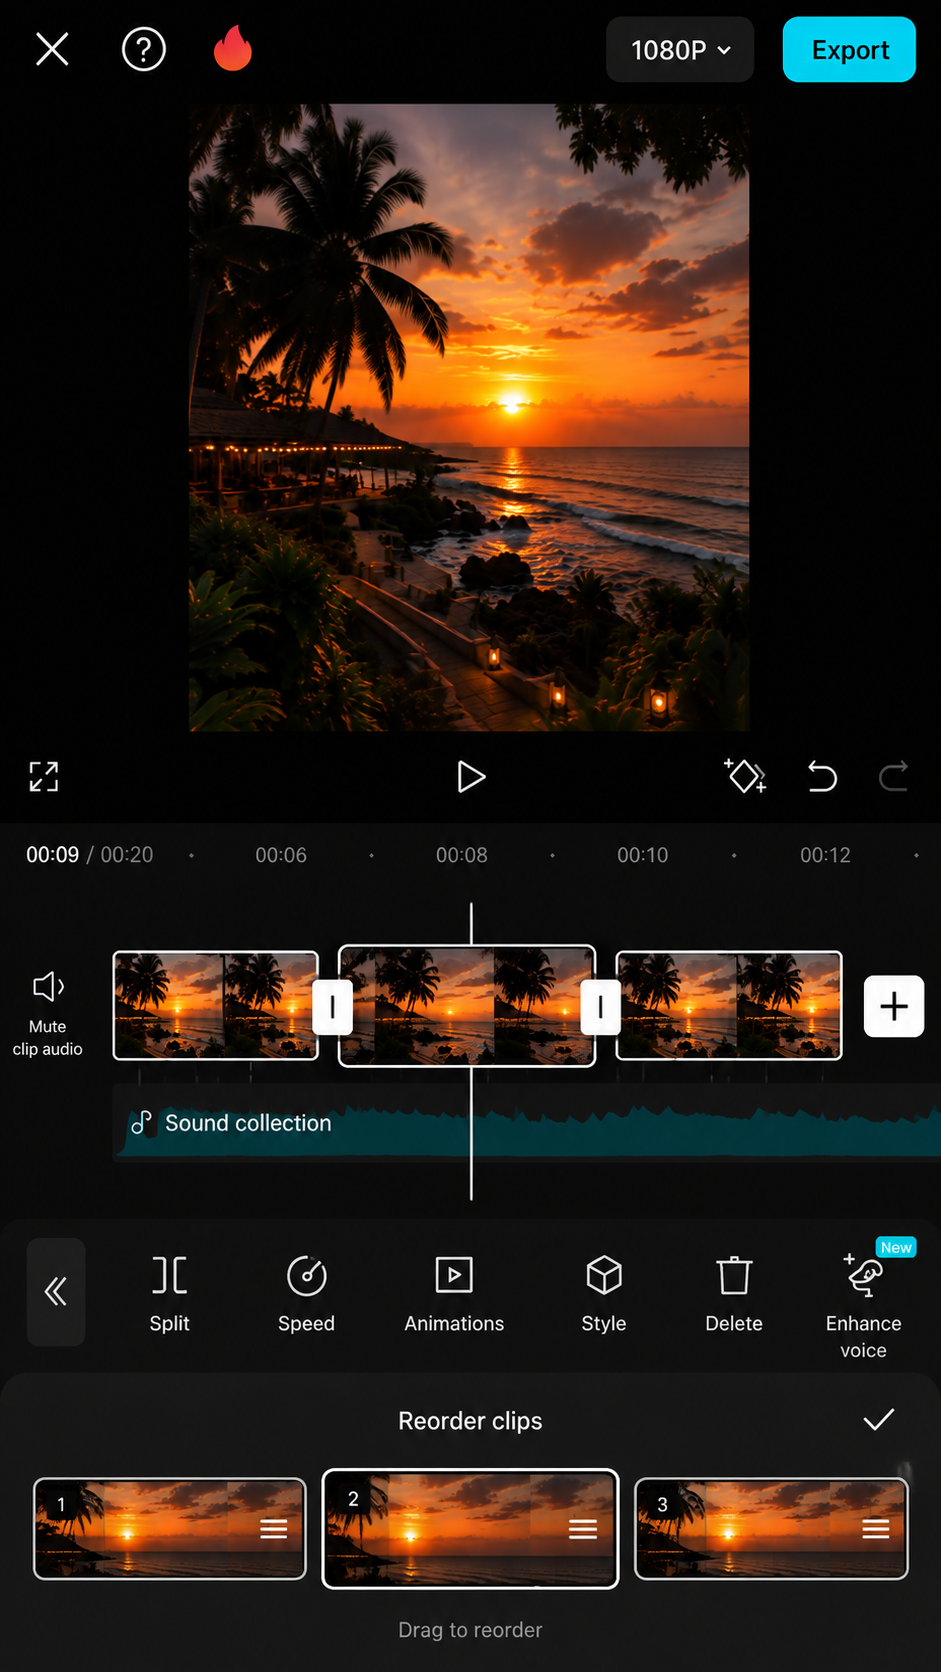
Reorder Clips
Press and drag clips into the order that best supports the message.
Make it easy
to follow.
Use one clear hook and readable captions that support the message without covering the video.
Add Hook Text
Add one short hook that tells viewers what the video is about.
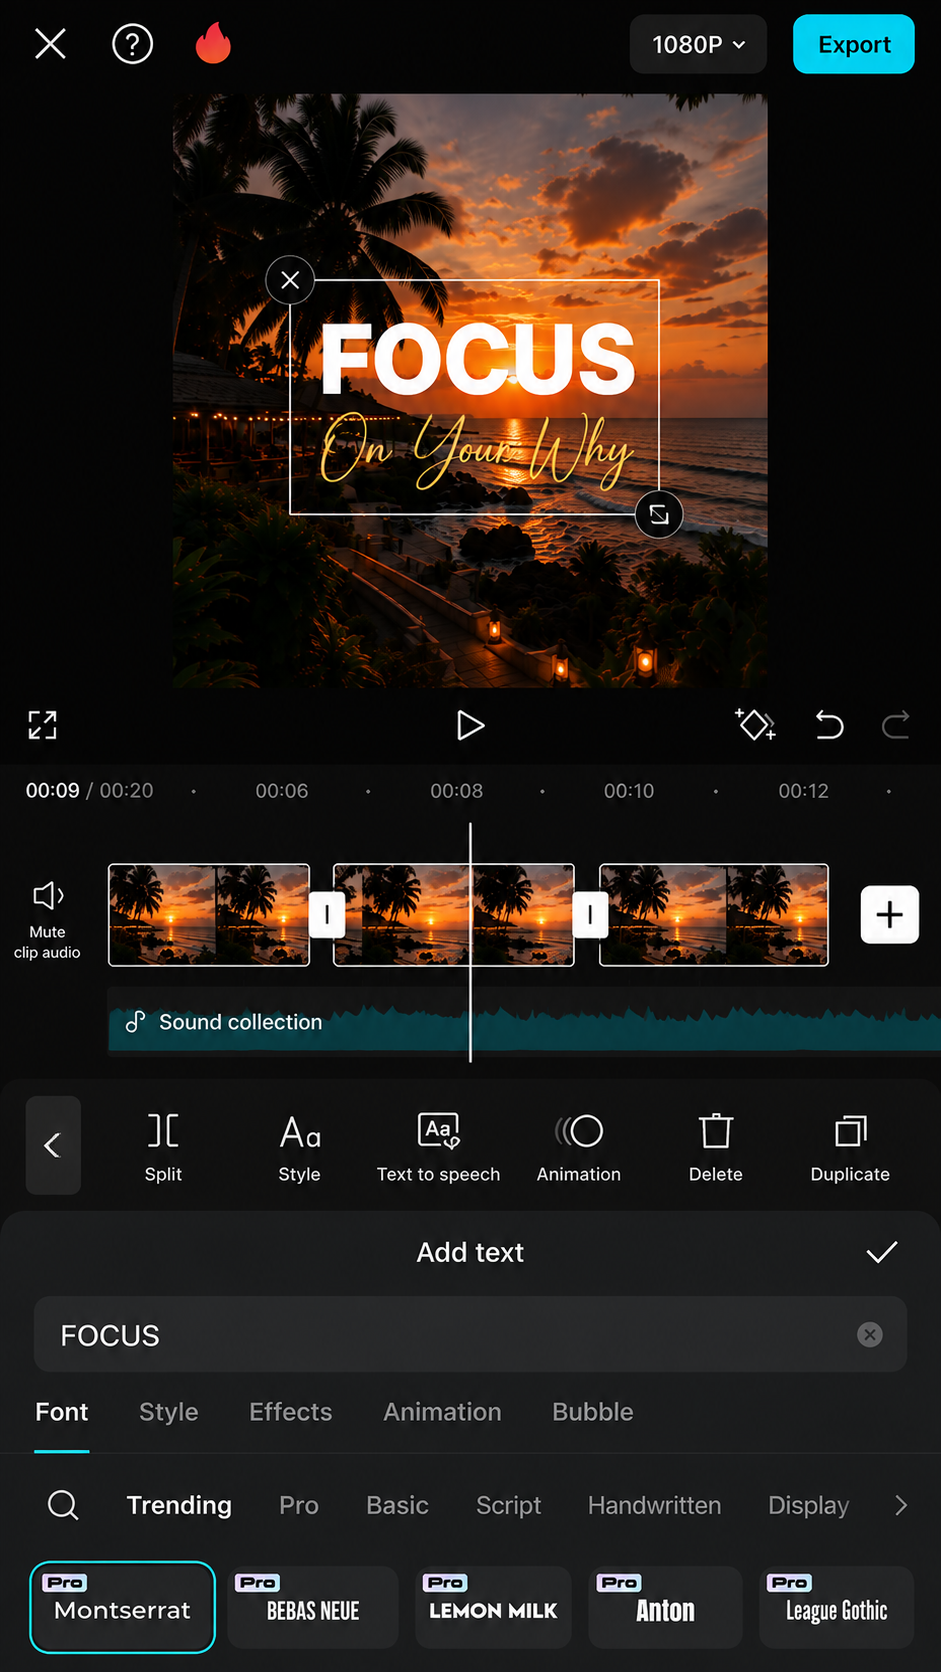
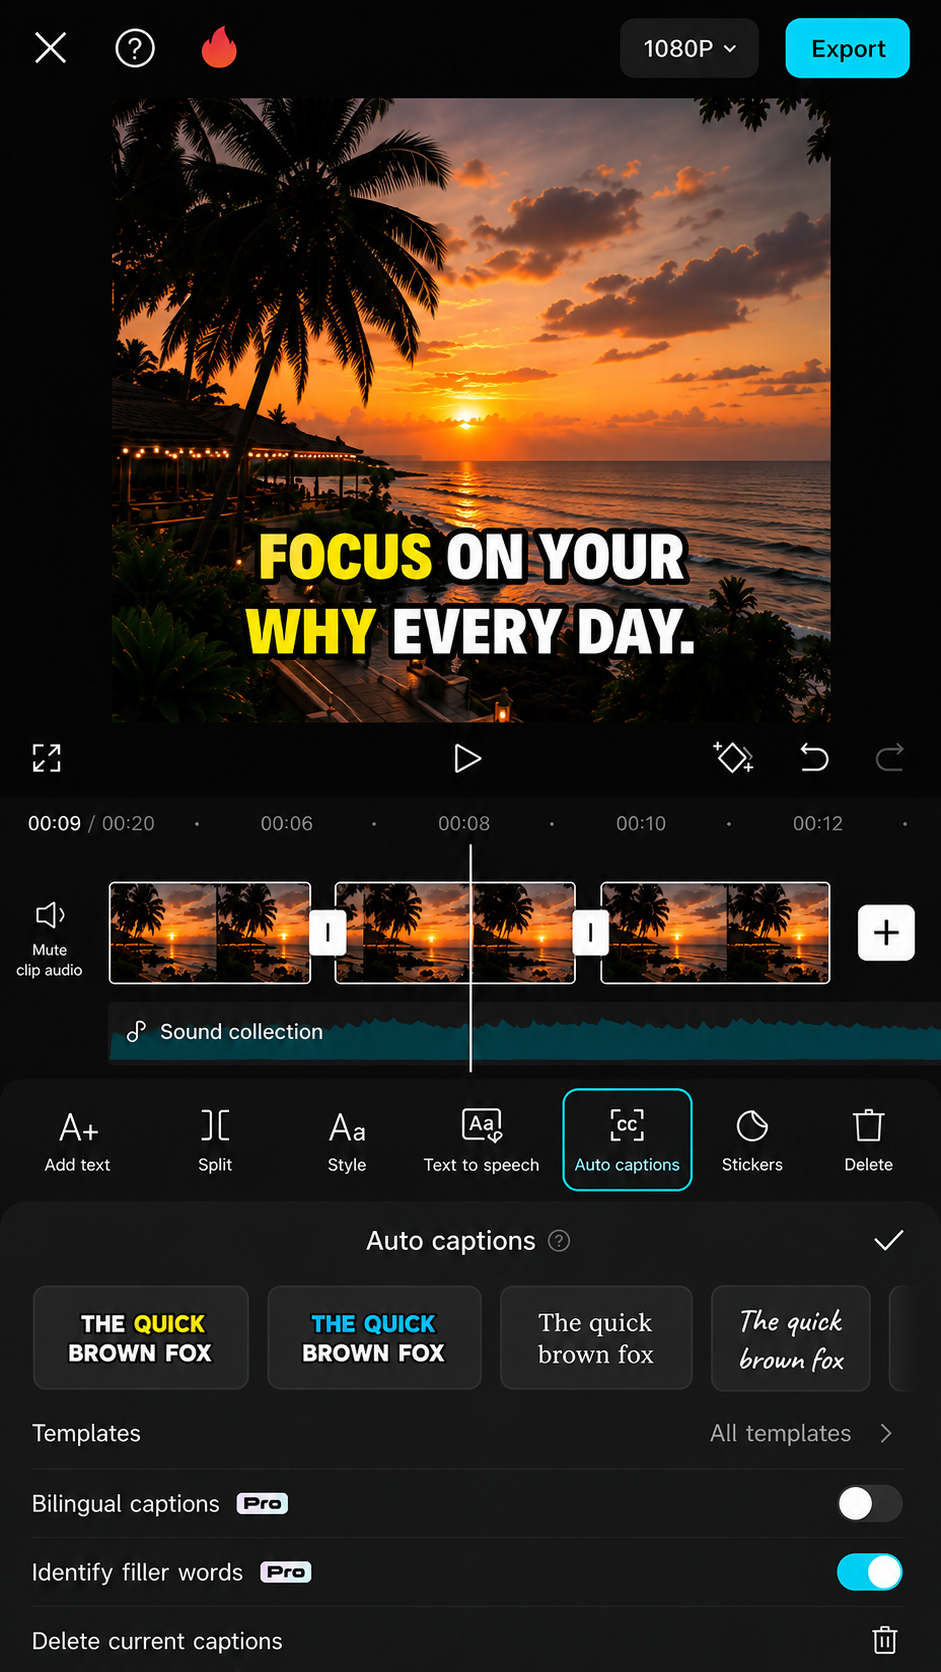
Open Auto Captions
Tap Text, choose Auto Captions and generate captions from the spoken audio.
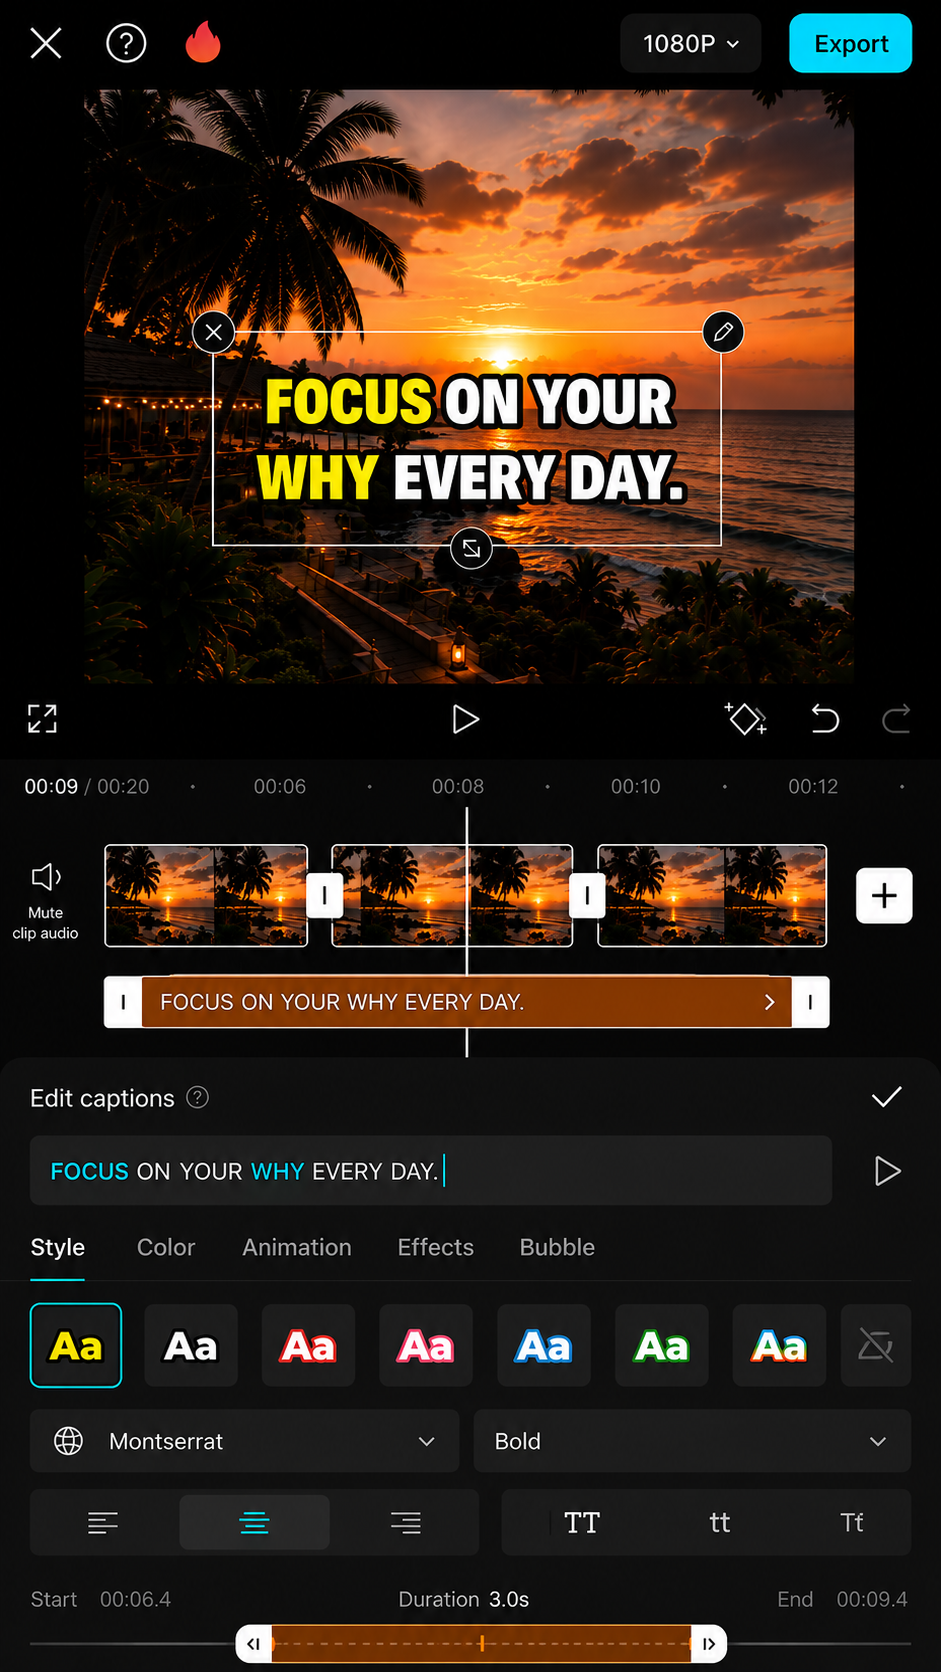
Correct the Words
Read every caption and fix names, punctuation and incorrect words.
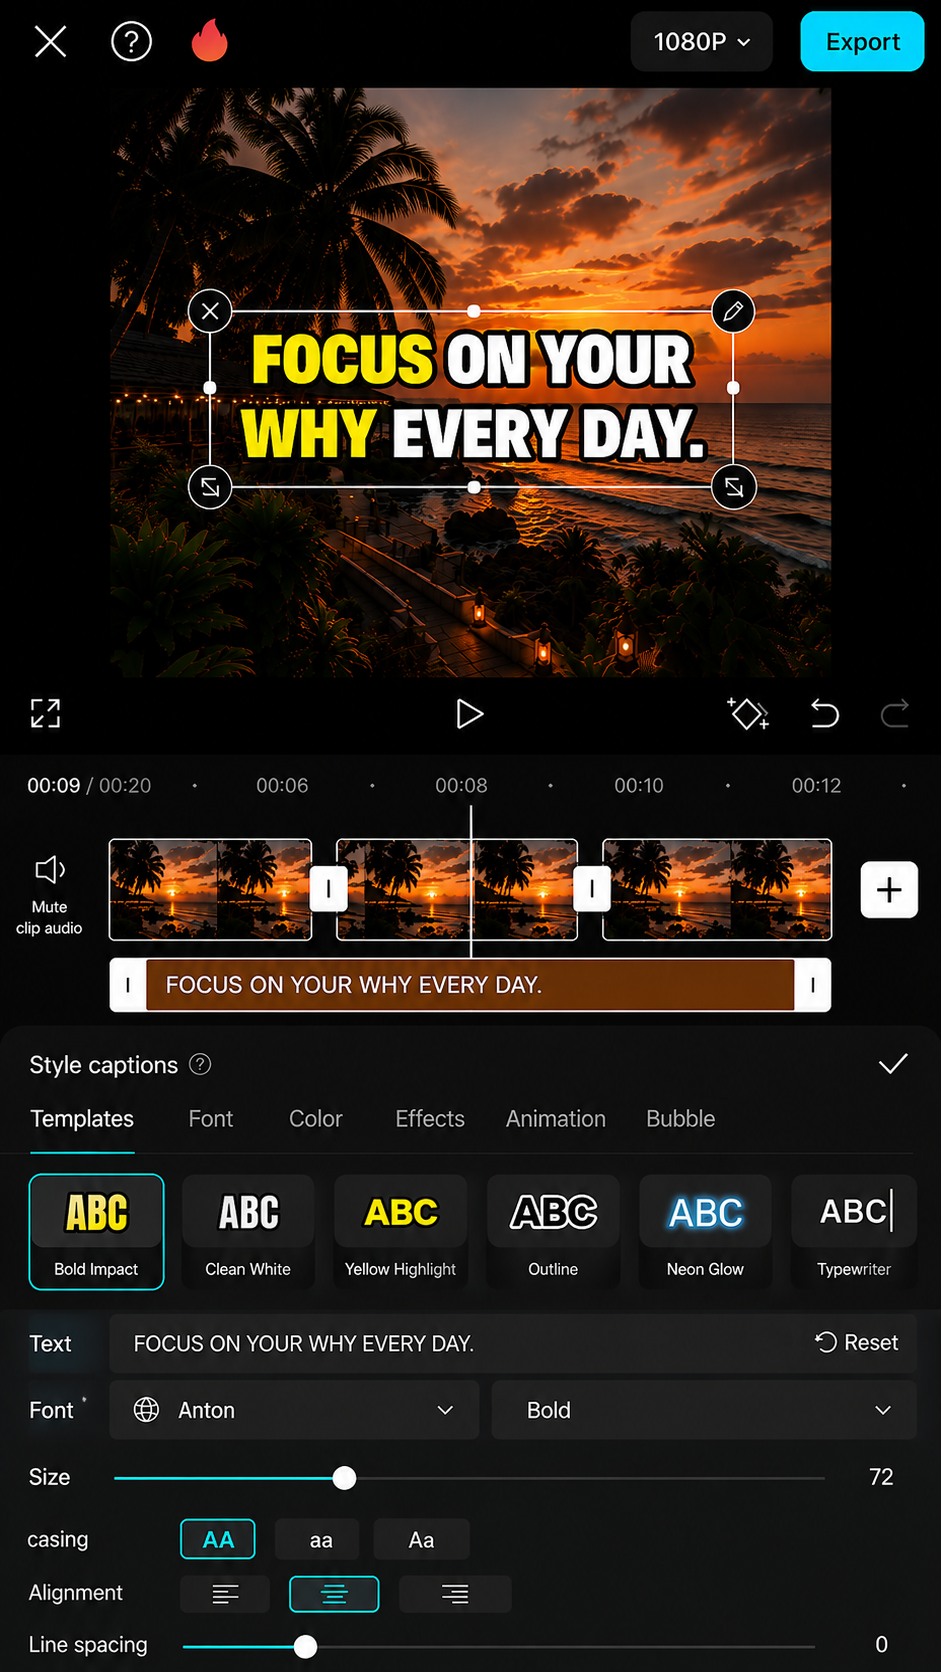
Style for Readability
Use a clear font, strong contrast and short lines inside the safe area.
Keep the voice clear.
Use effects with purpose.
Music should support the message, never overpower the person speaking.
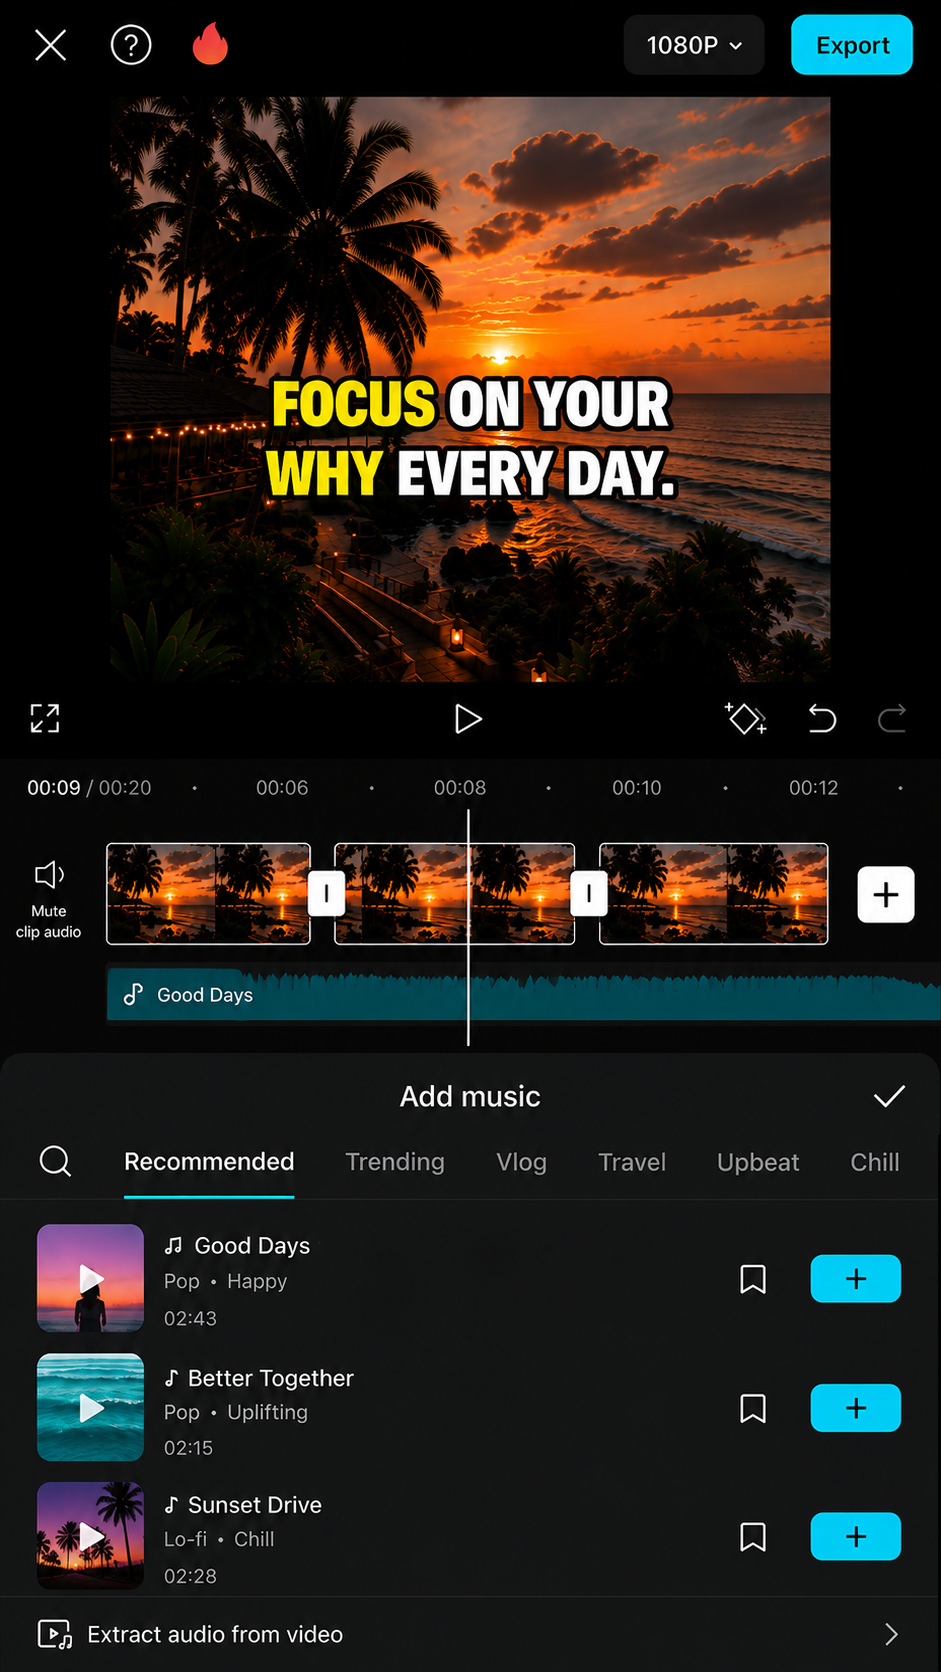
Add Music
Open Audio or Sounds and choose a track that fits the tone of the video.
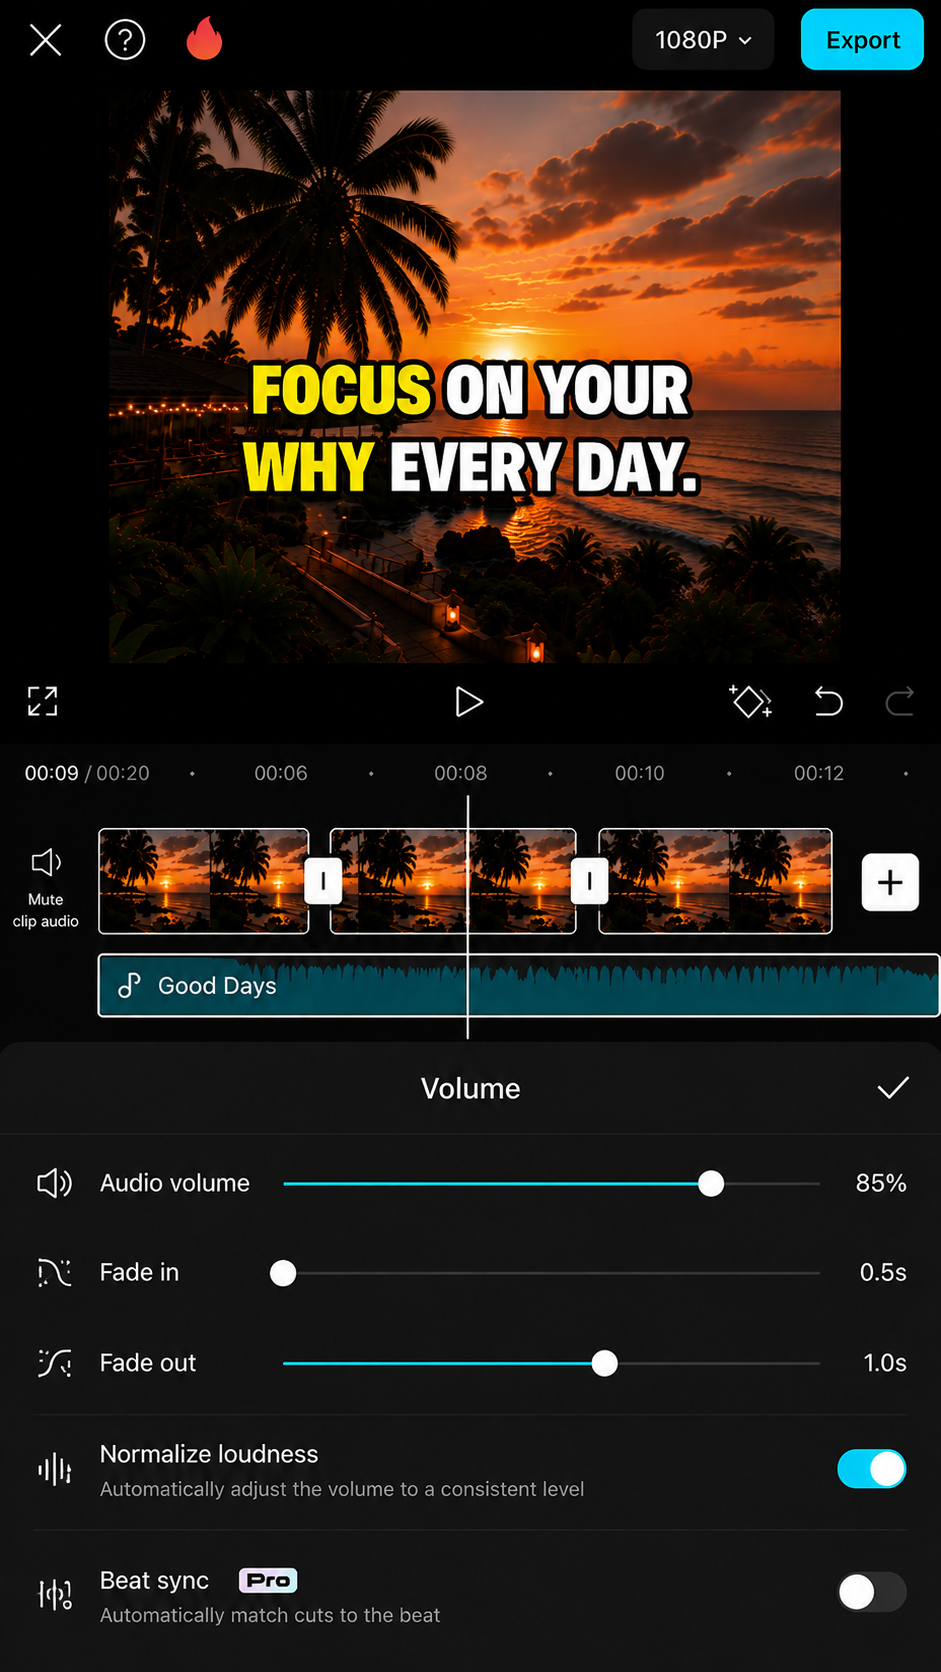
Balance the Volume
Keep voice audio strong and lower the background music until every word is clear.
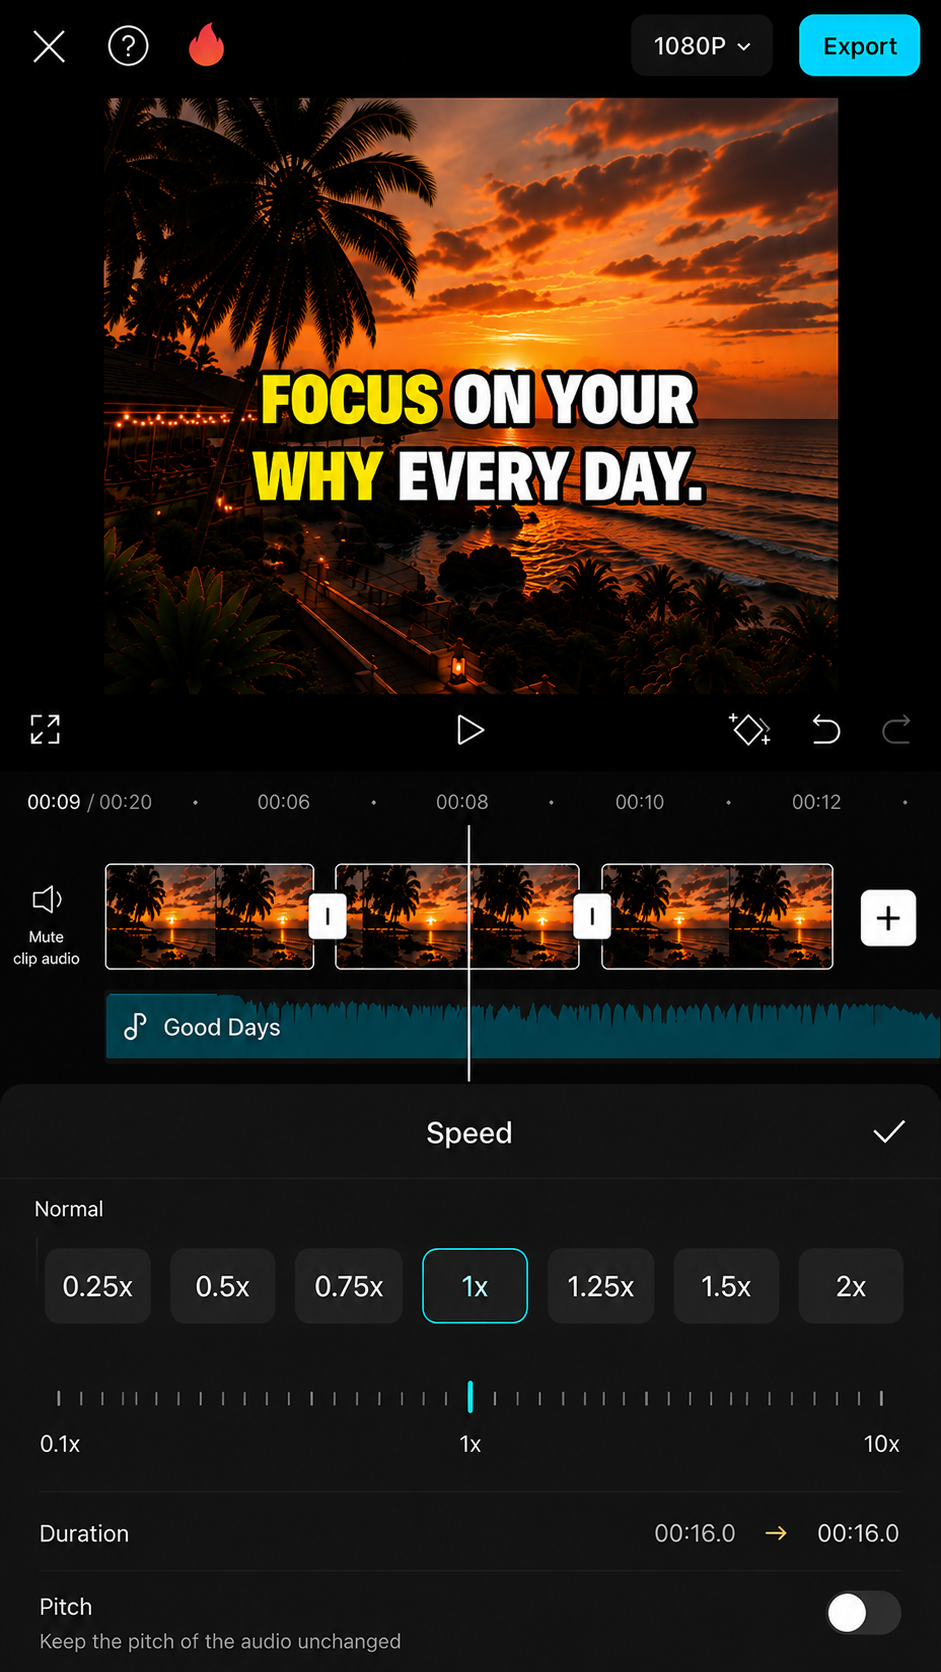
Adjust the Speed
Use normal speed for speech and faster or slower settings only when they support the clip.
Save one clean file.
Post it everywhere.
Export one clean vertical master file before uploading it separately to each platform.
Open Export Settings
Tap Export in the upper-right corner of the project.
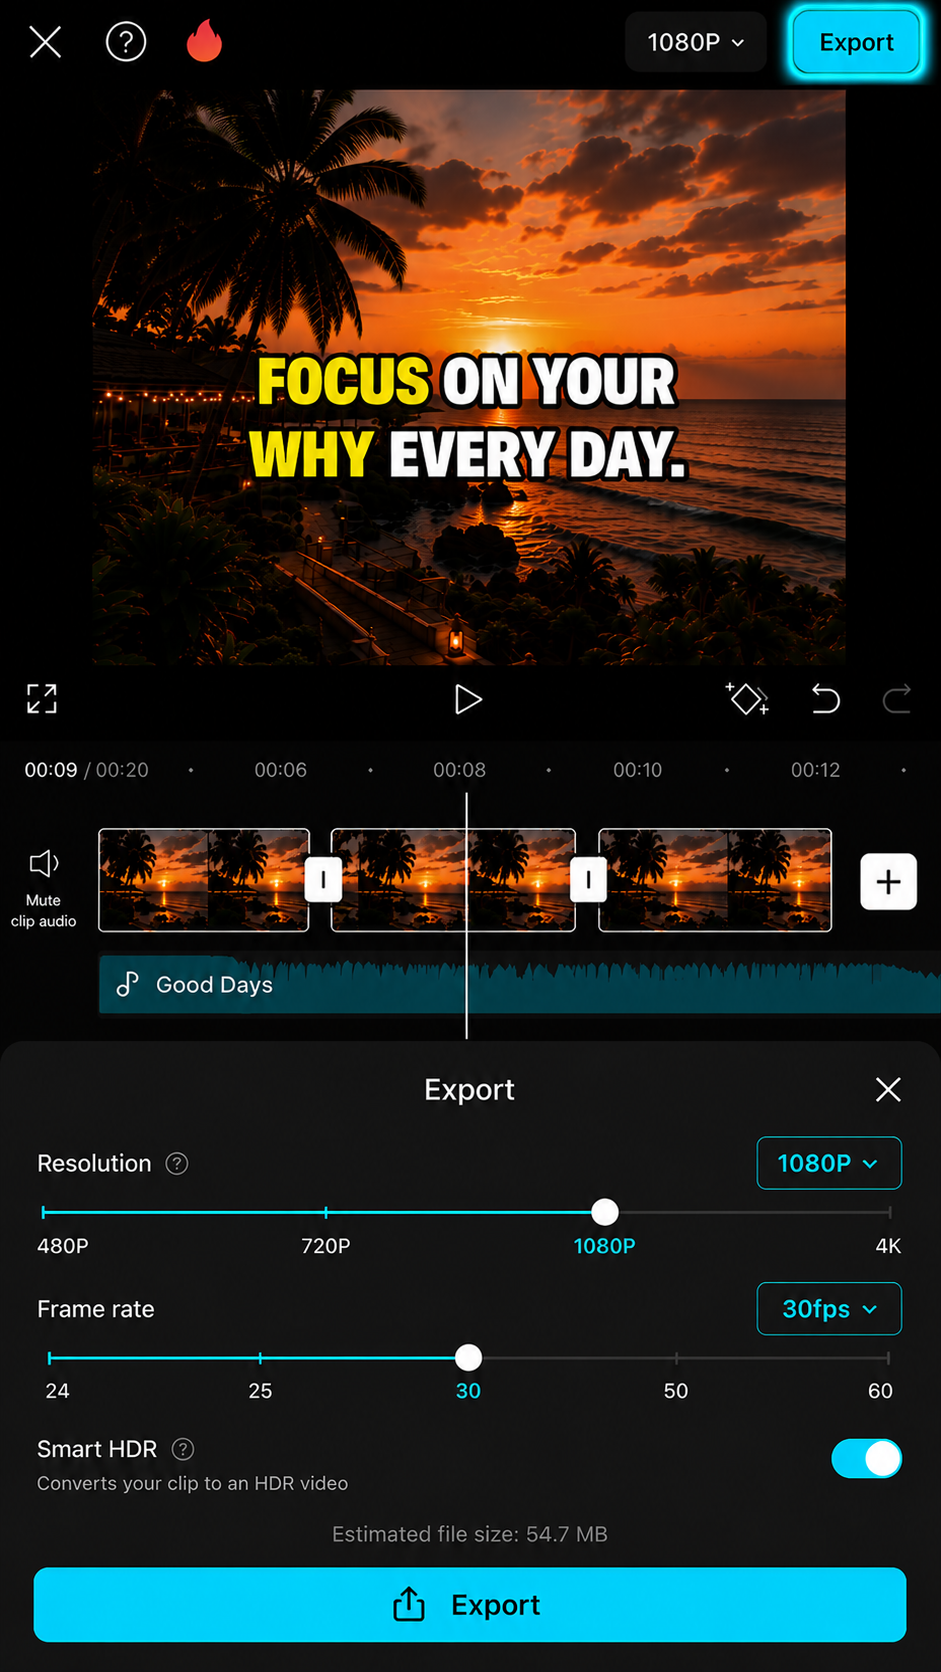
Use 1080p and 30 FPS
These are simple starting settings for clear social media video.
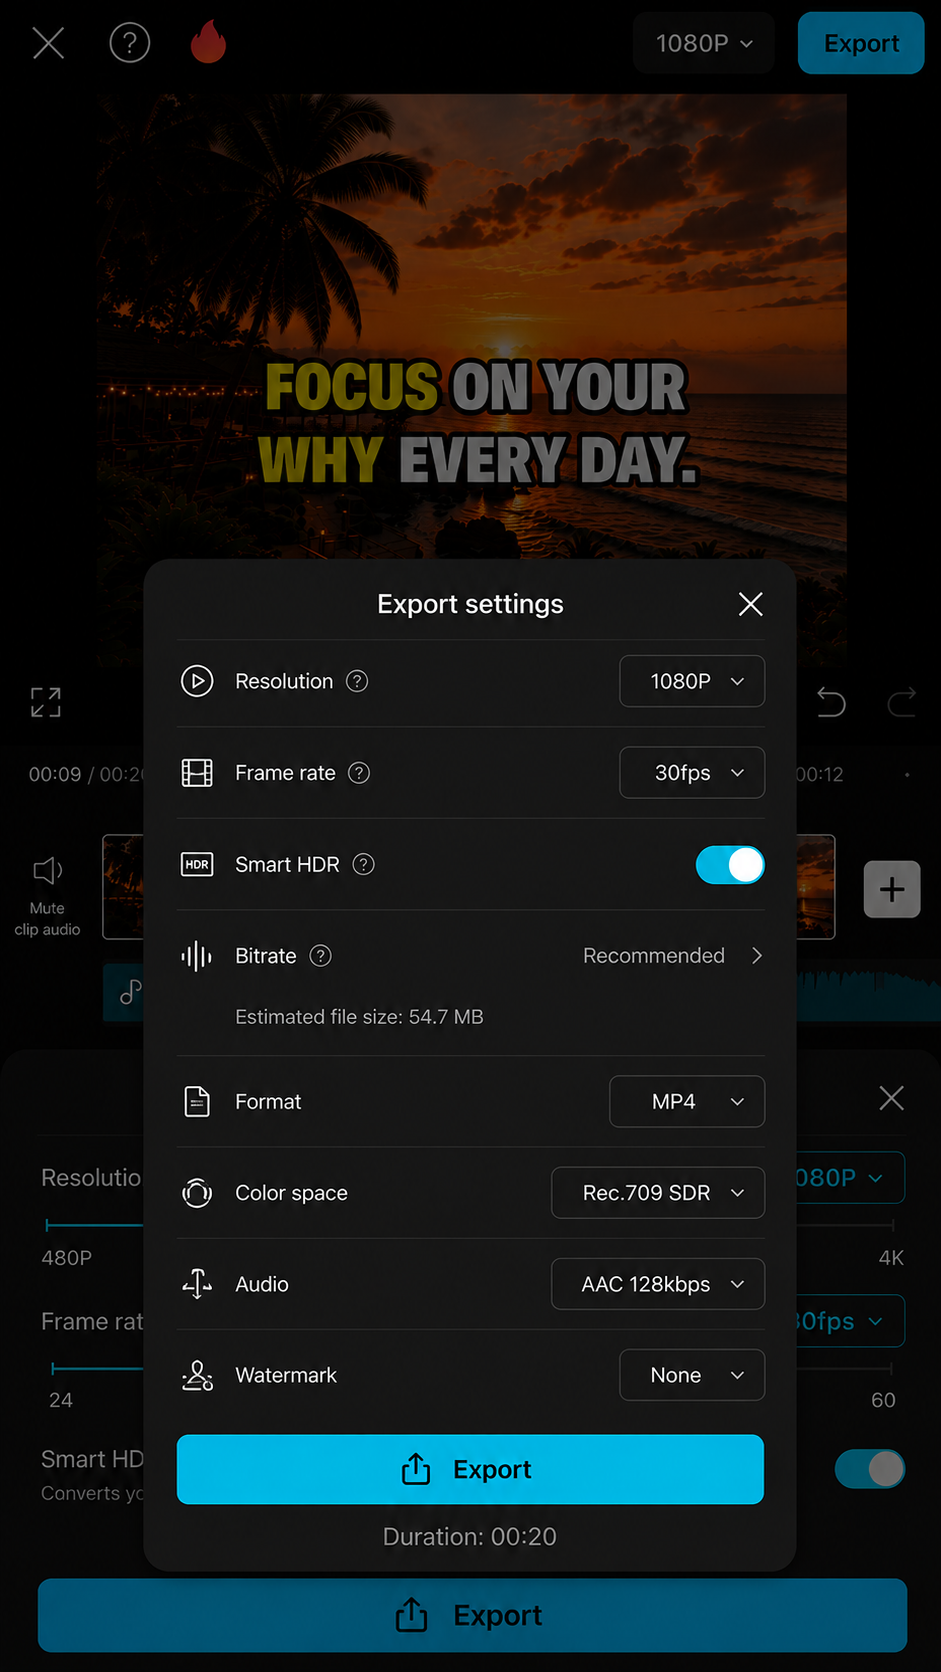
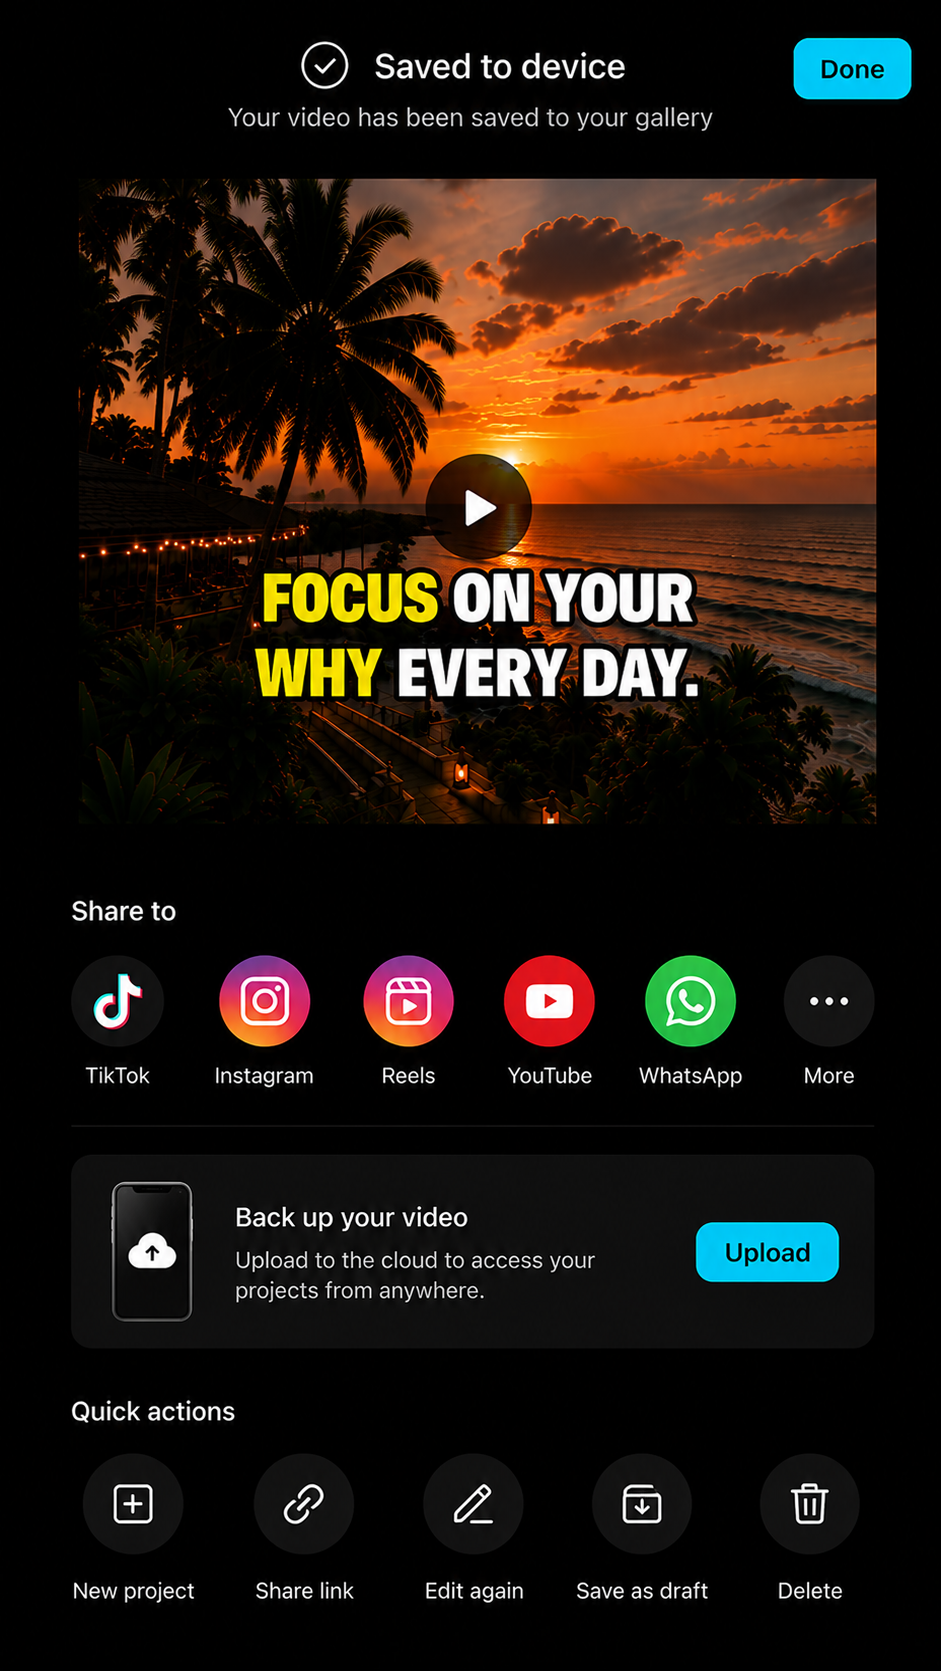
Save the Clean Master
Save the completed video to your camera roll before posting anywhere.
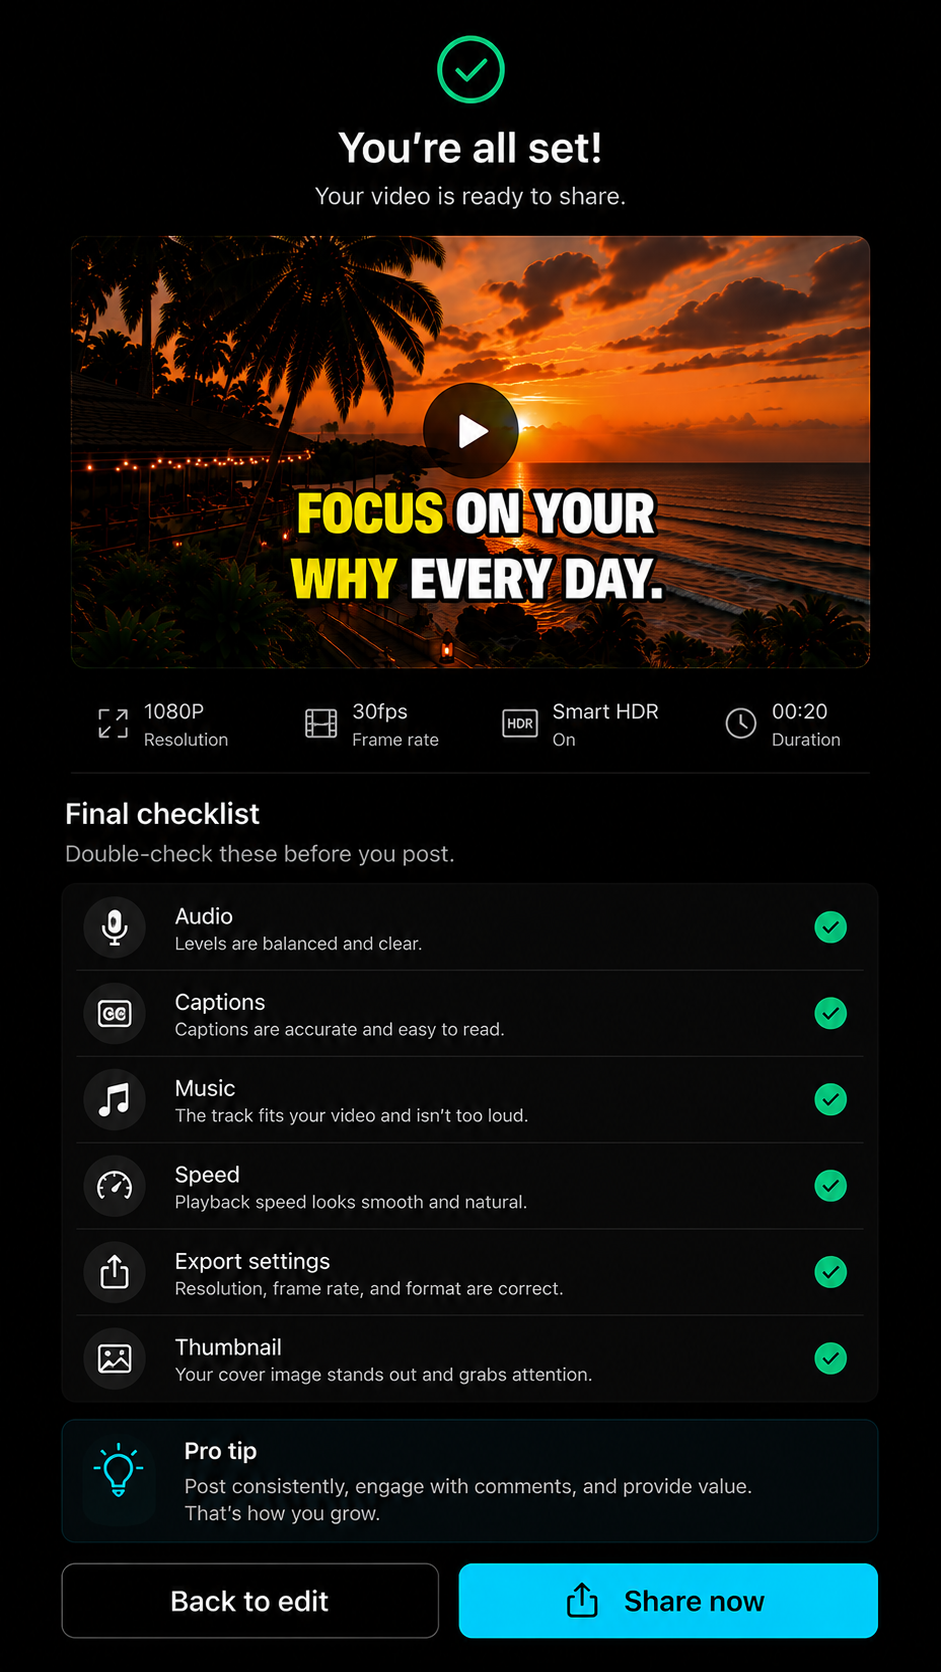
Final Editing Checklist
Vertical format, clean pacing, readable text, corrected captions, clear audio and a clean 1080p export.
Keep It Simple
Strong pacing, readable captions and clear audio matter more than dozens of effects.
Save a Master
Keep one clean copy without platform watermarks so it can be posted everywhere.
Watch It Once
Review the full video from beginning to end before exporting.
Video and Text
Audio and Export
Edit it clean.
Post it confidently.
Return whenever you need a visual reminder for importing, trimming, captions, audio or export settings.